
One of the veggies that grows best in my garden is Kale. I have a few soup and salad recipes but the majority of my kale becomes my favorite summer snack. Kale Chips.
These are nothing like the pre-made store bought kind!
Fresh kale from the garden or produce aisle made into kale chips at home: where you get to choose the oil and salt content is so much better!
These are light and crispy and satisfy that salty snack attack in a healthy way.
Choose Avocado or olive oil which are healthy fats that your brain needs for fuel. Choose Real salt, sometimes called Pink Himalayan salt, that still has the original minerals in it; minerals our body needs to function.
 Kale Chips
Ingredients/supplies
a bunch of kale leaves (1.25 inch diameter if all stems are bunched) Lacinato or Darkibur are good varieties but really any kind can be used.
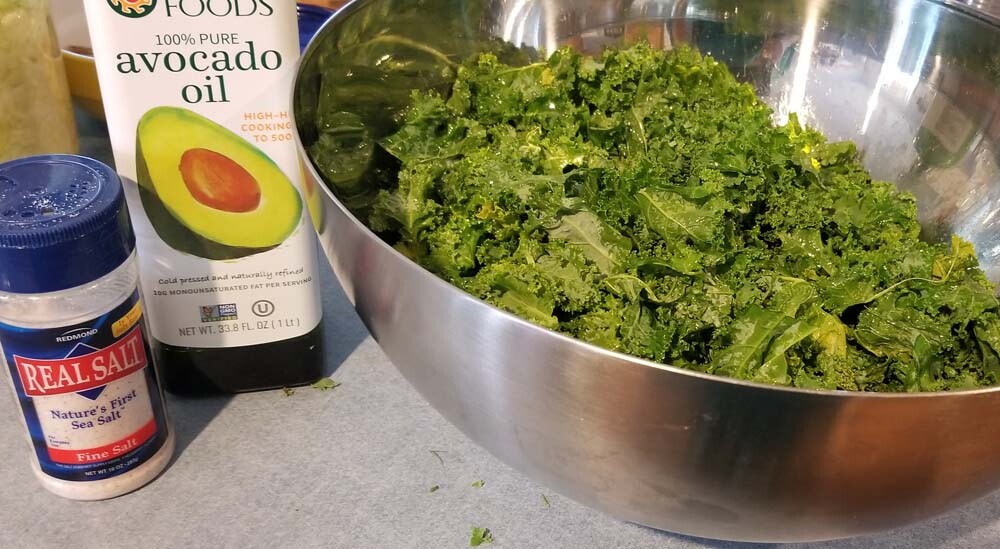
1.5 Tablespoons of Avocado or olive oil
1-2 teaspoons Real salt (pink Himalayan with all the minerals still in it)
2 baking sheets with edges
parchment paper
Fresh kale from the garden or produce aisle made into kale chips at home: where you get to choose the oil and salt content is so much better!
These are light and crispy and satisfy that salty snack attack in a healthy way.
Choose Avocado or olive oil which are healthy fats that your brain needs for fuel. Choose Real salt, sometimes called Pink Himalayan salt, that still has the original minerals in it; minerals our body needs to function.
Kale ChipsIngredients/supplies
a bunch of kale leaves (1.25 inch diameter if all stems are bunched) Lacinato or Darkibur are good varieties but really any kind can be used.
1.5 Tablespoons of Avocado or olive oil
1-2 teaspoons Real salt (pink Himalayan with all the minerals still in it)
2 baking sheets with edges
parchment paper
Instructions
Preheat oven to 275F
Make sure your kale is washed and well dried. Start by tearing the leaves into 1.5-2 inch pieces removing the stem and center spine as you go.
Once you have all the pieces in a bowl, drizzle oil over the leaves and toss with salad tongs or large spoons. Try to get the leaves evenly coated but not heavily saturated.
Sprinkle with salt, tossing more.
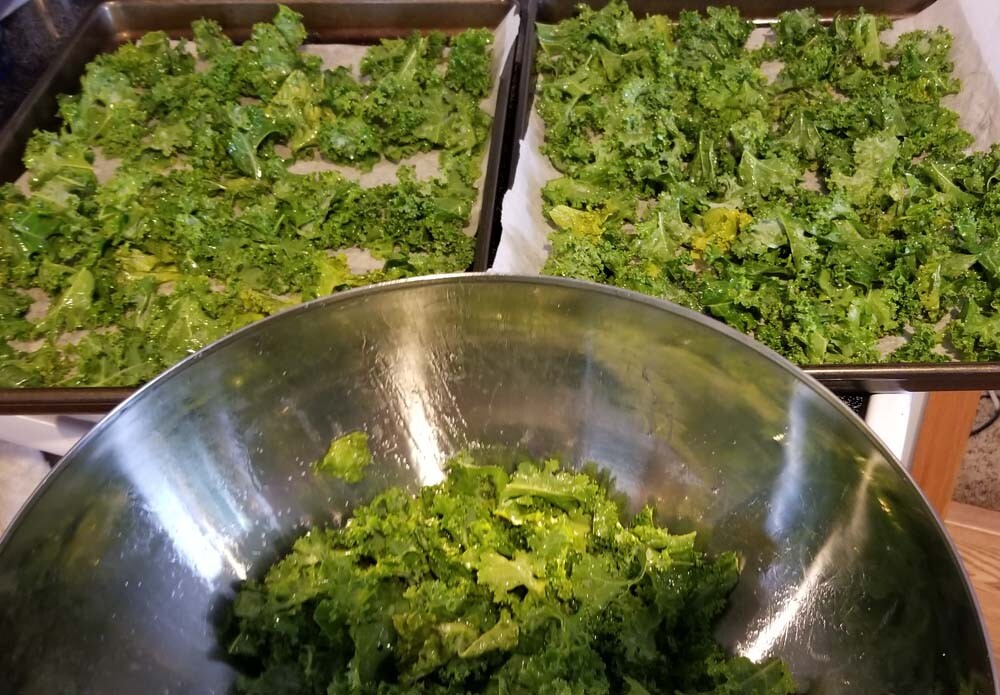
Spread in an even single layer on the parchment lined baking sheets. Try not to have them stacked in a pile as they won’t dry evenly. sprinkle with additional salt if desired.
Place in oven and set timer for 12 minutes. When the timer goes off, stir each pan to make sure they are not burning. If the oven heats at different levels on the shelves, switch shelves at this point. place back in oven and reset timer for 5 min.
Stir each pan again. the leaves with be shrinking and getting crisper. make sure they aren’t burning. reset timer for 3 min.
Check and stir again. They may need another 3- 6 min depending on the moisture in the leaves. Check in 3 min increments. Crispy but not burnt is the goal. they will crisp slightly as they cool.
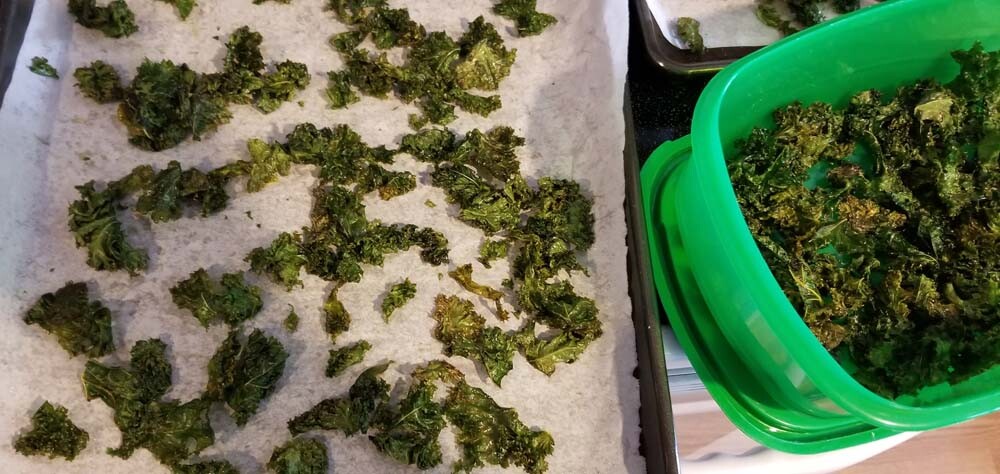
Once you take them out, allow them to cool on the baking trays. taste test. If, after a few minutes, some are still a little chewy, you can put the pans back in the cooling oven (off) and let them dehydrate more. check them every 5-10 minutes.
Store cooled chips in an air tight container (humidity will make them chewy again).
Enjoy a healthy salty-snack with less guilt.
Do you grow a garden? drop a comment below and let me know what you grow.
Preheat oven to 275F
Make sure your kale is washed and well dried. Start by tearing the leaves into 1.5-2 inch pieces removing the stem and center spine as you go.
Once you have all the pieces in a bowl, drizzle oil over the leaves and toss with salad tongs or large spoons. Try to get the leaves evenly coated but not heavily saturated.
Sprinkle with salt, tossing more.
Spread in an even single layer on the parchment lined baking sheets. Try not to have them stacked in a pile as they won’t dry evenly. sprinkle with additional salt if desired.
Place in oven and set timer for 12 minutes. When the timer goes off, stir each pan to make sure they are not burning. If the oven heats at different levels on the shelves, switch shelves at this point. place back in oven and reset timer for 5 min.
Stir each pan again. the leaves with be shrinking and getting crisper. make sure they aren’t burning. reset timer for 3 min.
Check and stir again. They may need another 3- 6 min depending on the moisture in the leaves. Check in 3 min increments. Crispy but not burnt is the goal. they will crisp slightly as they cool.
Once you take them out, allow them to cool on the baking trays. taste test. If, after a few minutes, some are still a little chewy, you can put the pans back in the cooling oven (off) and let them dehydrate more. check them every 5-10 minutes.
Store cooled chips in an air tight container (humidity will make them chewy again).
Enjoy a healthy salty-snack with less guilt.
Do you grow a garden? drop a comment below and let me know what you grow.
You might be interested in my garden planner and a 5 part series on natural solutions to gardening. Click here to download yours today.


0 Comments